Fall Back. My least favorite time of year. Don't get me wrong, Fall is my favorite time of the year...cooler air, leaves changing, candy corn, pumpkin pie, football, etc. are all awesome. I'm just not crazy about it getting dark outside around 5 o'clock.
So, what better way to ward off the Fall Back depression than a super happy fun happy super fun project. I could think of nothing more appropriate than making a clock, or actually clocks. This way I can put them all over the place as a reminder to set my clocks this weekend and hopefully I won't come to work an hour early on Monday.
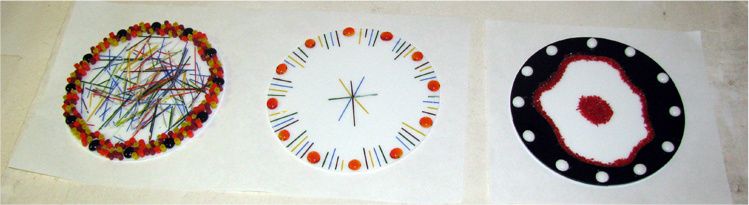
Anyway, I hope you enjoy the following pics and get inspired to make your own clock! to make the clocks I decided to use white circle blanks to hide the clock body.
Clock 1
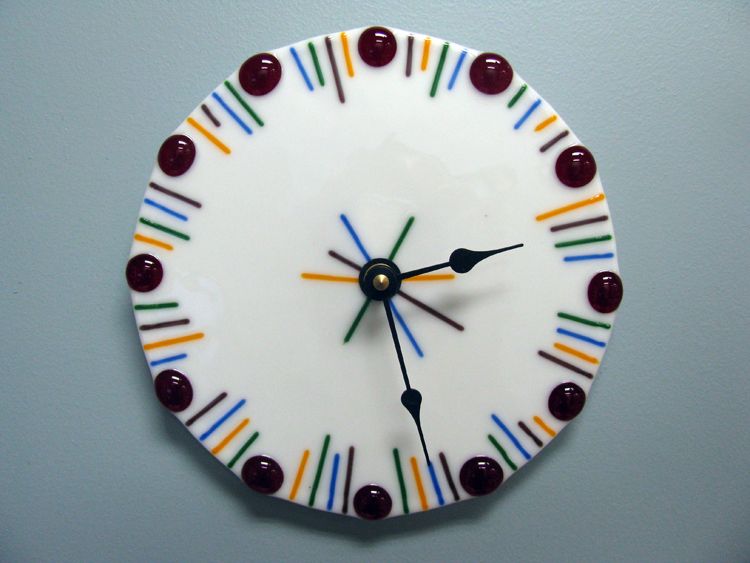
Materials:
8" White Glass Blank (#GBC8-200)
12 Cherry Red Pebbles (#GP151)
1 each of Yellow, Blue, Green and Grape Stringers from a pack of Mardi Gras Stringers (#SM96)
1 Clock Body (#8500)
1 Set of Clock Hands (8504)
Clock 2
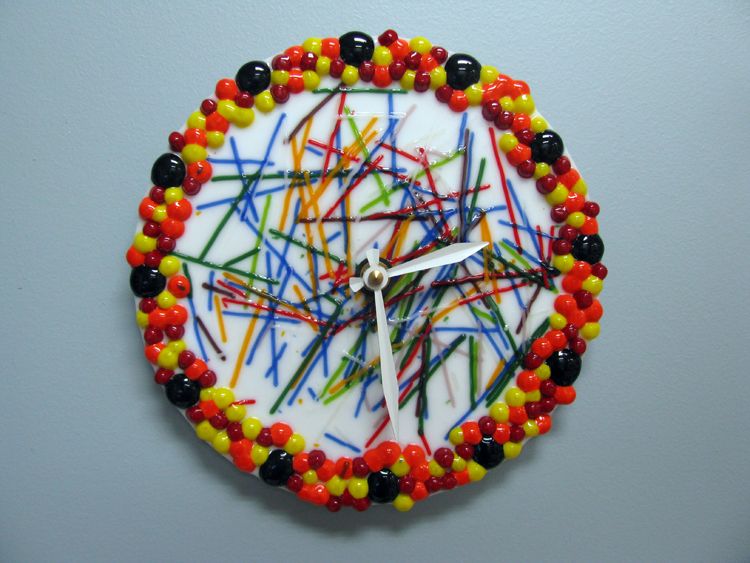
The second clock face only required the use of one tool, the Wheeled Nippers. I did the same pebble placement for the hour marks on this one, but used black Pebbles this time. I created a rim around the clock using Red, Orange and Yellow rod dots. I nipped two full rods of each color for the border. I didn't want all the rod dots to be the same size, so I just nipped them into a bowl. In the middle of the clock I used the full color assortment of Mardi Gras Stringers and broke them the same way as the other face, by snapping them in my fingers. As I snapped the stringers, I sprinkled them in the center and tried to cover the entire area.
Materials:
8" White Glass Blank (#GBC8-200)
12 Black Pebbles (#GP1009)
2 each of Yellow, Red and Orange Rods (#RO267-72-96, #RO2502-96, and #RO2702-96)
1 Clock Body (#8500)
1 Set of Clock Hands (8503)
Clock 3
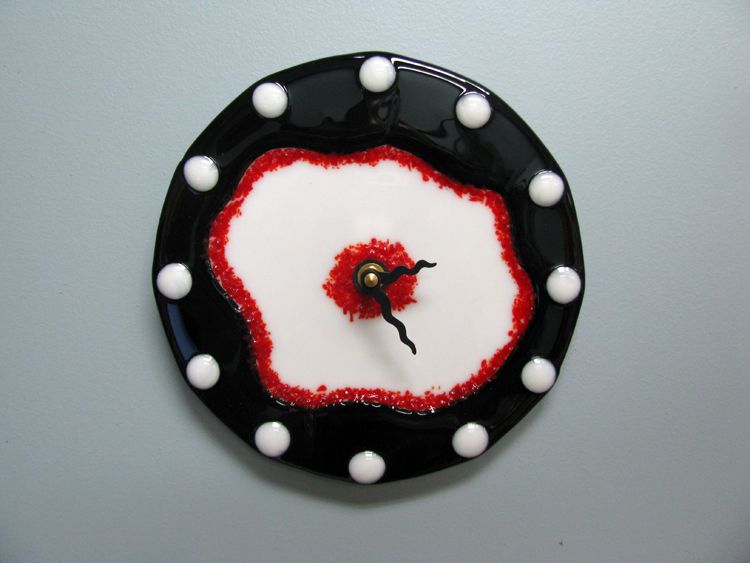
For the third one, the only tool I needed was a glass cutter. I would say this one takes a little bit of skill with the cutter and a good feel for running score lines. You'll see what I mean in a minute. I started with two blanks, one black and one white. I wanted to make a funky organic looking black rim around the white face. This is how I made the rim using the "self healing" properties of glass to my advantage. I call this the easy man's way to cutting rings, but this is what I was talking about when I said it required a little skill to do this piece. I cut the black blank in half and made a wavy arched score on one side. Then I laid the two halves back together so I could find the start and end points of the wavy arch for the second side and made that score line. Next, I gently ran the scorelines and broke out the two halves of the ring. That was the hard part. The cool thing is that the seams between the two will heal when the piece is fired. I glued the ring in place and then ran a bead of glue around the inside of the ring. Then I poured Red Opal Frit in the middle and brushed it into the glue to make the ring border. After that I made a circle of Red Opal Frit in the middle of the face and placed white pebbles to represent the hour marks and I was done!
Materials:
8" White Glass Blank (#GBC8-200)
8" Black Glass Blank (#GBC8-1009)
12 White Pebbles (#GP200)
Jar of Red Opal Frit in Medium texture (#2502-96-F3)
1 Clock Body (#8500)
1 Set of Clock Hands (8501)
After all three were made, the only thing left to do was contour fire them, drill 3/8" holes in the center for the clock bodies, and hang them on the wall.
To see pictures of the clocks before they were fired, go here
No comments:
Post a Comment
Note: Only a member of this blog may post a comment.